My home-made Altoids travel tin is traveling in France! Sadly, I am NOT traveling in France. I gave it to a deserving artist, who filled it with these watercolors and is giving it a good workout. Photos to be posted later.
If you're interested in making one, here's what I did...
 |
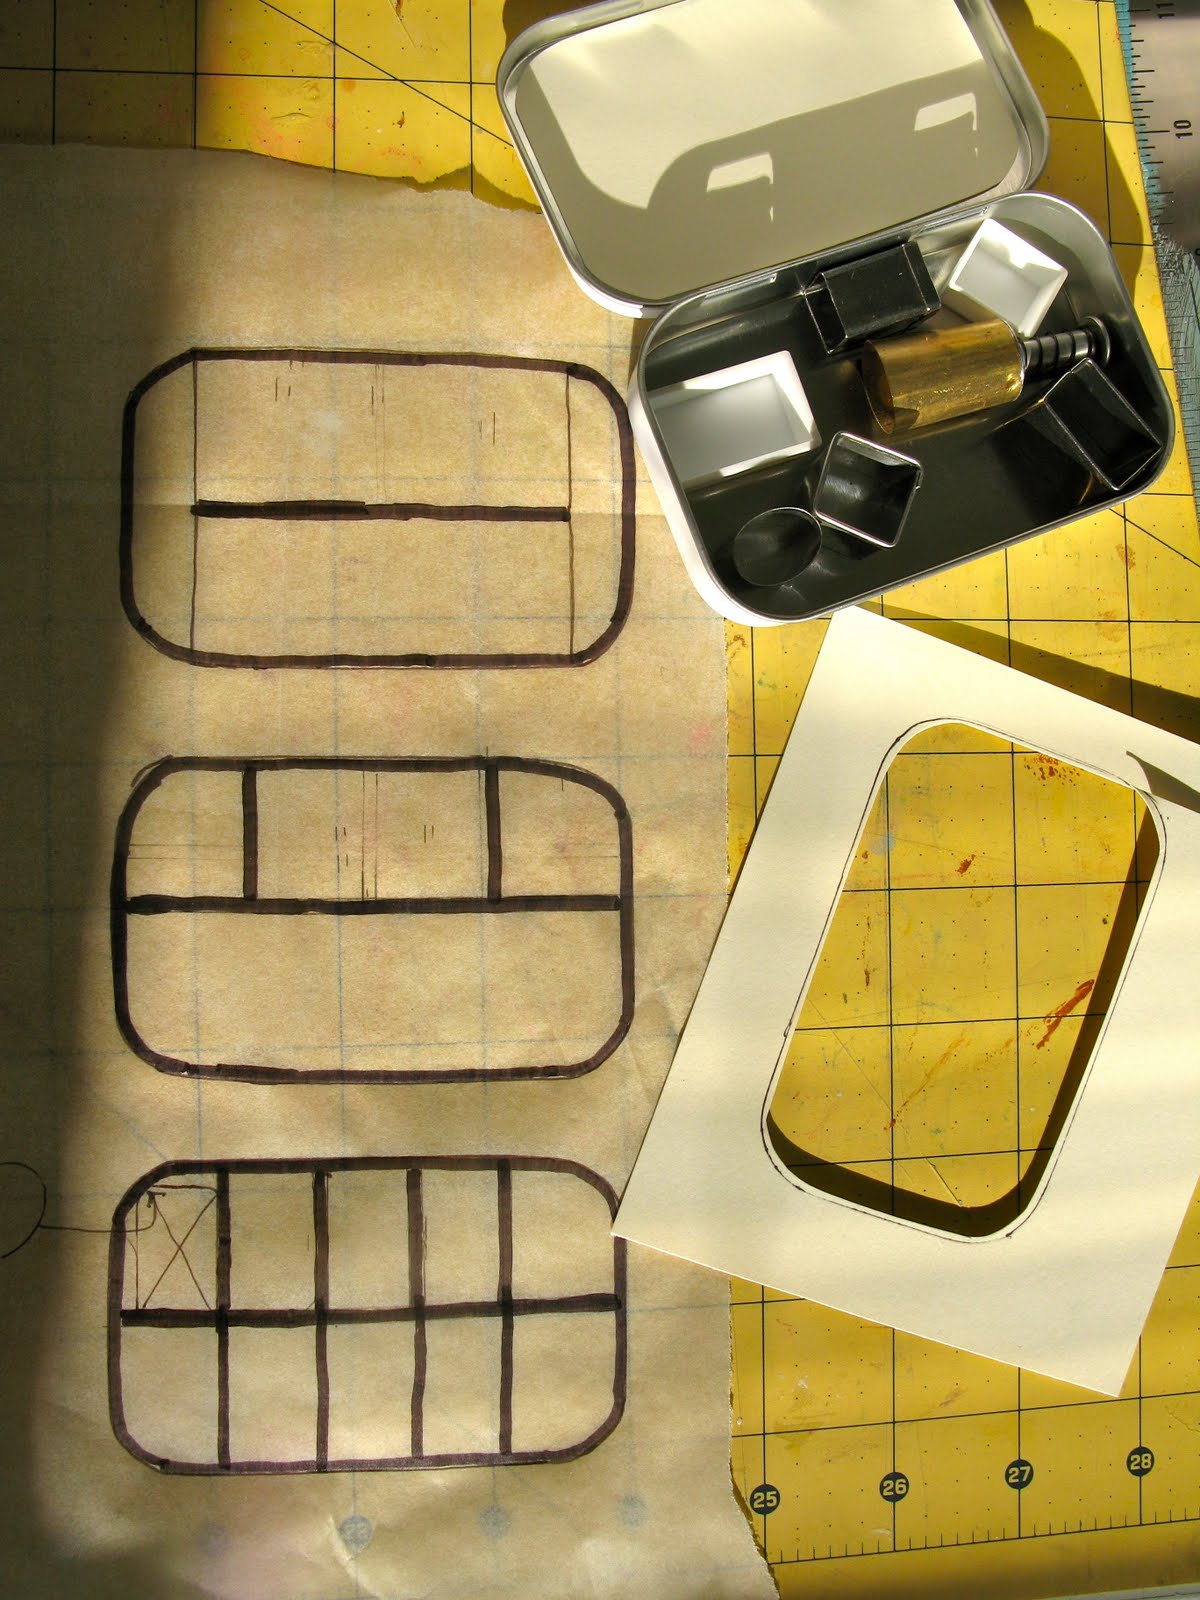
| First, trace around the outside of the tin 3 times. You are making a template for 3 layers of polymer clay. Draw the pans you think you'd like to make. I drew a couple of designs before choosing one. If you use a fat marker (like an old Sharpie) it will make a line about 1/8 inch wide and that is the thickness you need to leave around the outside of the template and between each pan. You can make the pans any shape and size you like. |
 |
| Condition your clay and roll it out a the thickest setting. Cut 3 pieces from your template. I chose a very white clay with a bit of sparkle. |
 |
| Typically, using cutters like these cookie cutters will give you the best cuts in polymer clay, but these were not the exact shape and size I wanted and since I had to cut both remaining layers identically, I ended up with some very wonky holes. |
 |
| I found that using the blade cutter to mark the cutting lines worked best. First I lightly marked them, then I cut out the openings with a craft knife. If you wish, you can lay the tracing paper template right on top of the clay to mark it. Repeat on the other layer and put them both into the tin. You now have a stack of 3 layers - one is not cut at all and the top two are cut identically to form paint pans. |
 |
| Use a clay tool to square up the edges and smooth the openings. Manicure tools would work, too. Roll out a very thin snake of clay and using the tool, press it into the void between the clay and the edge of the tin. This will keep water from slopping down the sides into the bottom. Fire per manufacturer's instructions, cool it and fill! |


Well is that cool or not! Beautiful job!
ReplyDeleteThanks for the step by step info ! Wonderful result !!
ReplyDeleteWOW
ReplyDeletebut I still don't get HOW you did it...
Are you taking orders?
Sell it on Etsy
It would go like HOT CAKES!!
That is so amazingly clever! I like the Etsy idea too.
ReplyDeleteI'd buy one of those babies on etsy in a heartbeat, and trust me, I would never in a million years take the time to make that myself. Wonderful, Jeanette, and I agree--I'd totally buy one of those on etsy. Your directions were very clear and good, but I know I wouldn't do that. You're very patient!
ReplyDeleteDitto etsy . . . if you are patient enough to make these en masse!!!
ReplyDelete